
To enter, all you have to do is to leave a comment on my blog to be in with a chance of winning $25 Heartfelt Creations gift certificate. Click on the links at the bottom of the blog to access each Alumni Team Members blog and you will automatically be able to see their stunning inspirations for this months blog hop. Comment on as many Heartfelt Creations Alumni blogs as you like… remember… the more blogs you comment on the more chance you have to win! Don’t forget to click on the Heartfelt Creations blog at the end of the blog and leave a comment for yet another chance to win $25 Heartfelt Creations Gift Certificate. That means there are two chances to win!!!!
The winners will be announced on the Heartfelt Creations Facebook Page and the Heartfelt Creations Blog on Wednesday August 3rd 2022. If you are a lucky winner claim your prize by emailing socialmedia@heartfeltcreations.com with the title ‘WINNER OF THE JULY 2022 ALUMNI HOP’ within 72 hours of the announcement. Good luck 😍


Hello and welcome! 💕
To my 3D book card using the wonderful Mushroom Cottage Collection for this months Heartfelt Creations Alumni blog hop and had so much fun creating 😍
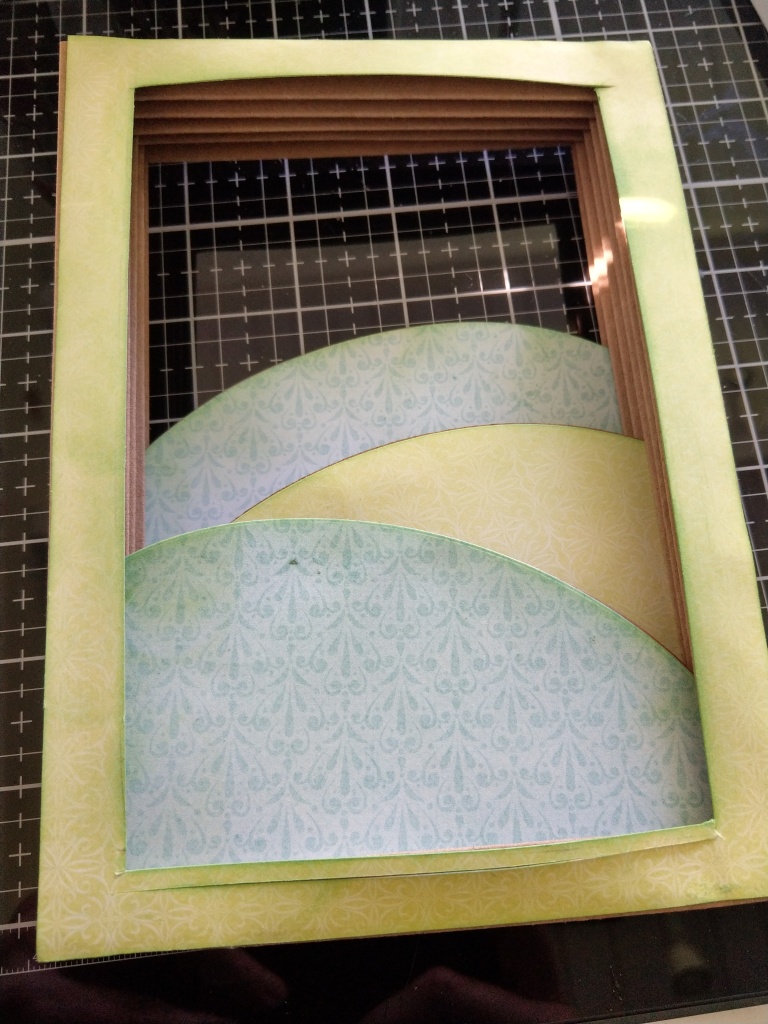
The internal book element in kraft cardstock is 5 x 7″ and I was intending on mounting it onto a regular card blank but got carried away with this magical collection and mounted it within a book cover using The Mushroom Cottage Collection Paper. I allowed a 1/4″ rim around the top, bottom and right hand side of the book. You can alter these dimensions to create a different size and shape book.
Start by creating the 3D book part in kraft cardstock. Cut two of each size 5 x 5″ and 6 x 7″ and score every 1/2″.

Before you adhere all your sides together lay your concertina pieces out open end facing inward. TIP: interlock the pieces together dry to see how they slot together before adding your adhesive. Apply adhesive to the facing element of each concertina piece this allows the book to squash flatter or tease fuller. TIP: each time you adhere a side in place have something that has a true corner and use it to keep your book pieces at a right angle.


Use a pencil to draw around the inside and outside of the book onto patterned paper then cut out with a trimmer or scissors. Ink the edges and adhere to the front of the book.


Use the oval die to die-cut 4no. kraft and 4no. in Mushroom Cottage Paper Collection and adhere together to create a rigid hills. Trim down the ovals to create different angle and sizes and ink the edges.TIP: keep offering the hills inside the book to ensure they fit, once you are happy with the position of the hills apply a little glue behind the hill and fix in place. Leave one oval whole and cut to size when the lighting has been installed.

Stamp onto white cardstock the mushroom cottages and colour. I used distress inks and a water pen. Die-cut with the co-coordinating die and use a hole punch to cut out in the mushroom caps. Die-cut a velum and adhere behind.
Use a clear tape to hold the light wire in place and adhere the mushroom onto the hill at the back. Work your way forward hiding the wire behind the hill in front continue until the nearest mushroom is in place. At this point cut your spare hill to hide your light battery pack alternatively hide with other die-cuts.


Stamp onto white card stock Large Cottage Mushroom, Mushroom Cottage Accents, Mushroom Fairies and Wild Poppy Accents colour and die-cut and decorate around the book frame. Hiding the battery pack ensuring easy access to the switch. TIP: if you wish the battery pack to be removable to allow battery replacement adhere in place with removable glue dots.
Create your book cover cut kraft card stock 5 3/4″ x 7 1/2″ and 6 1/4 x 7 1/2″. Lay the 5 3/4″ portrait in the score board and score at 1/2″ to create a tab. Lay 6 1/4″ portrait in the score board and score at 1″. Line with Mushroom Cottage paper inside and out. TIP: use the kraft card as a template.


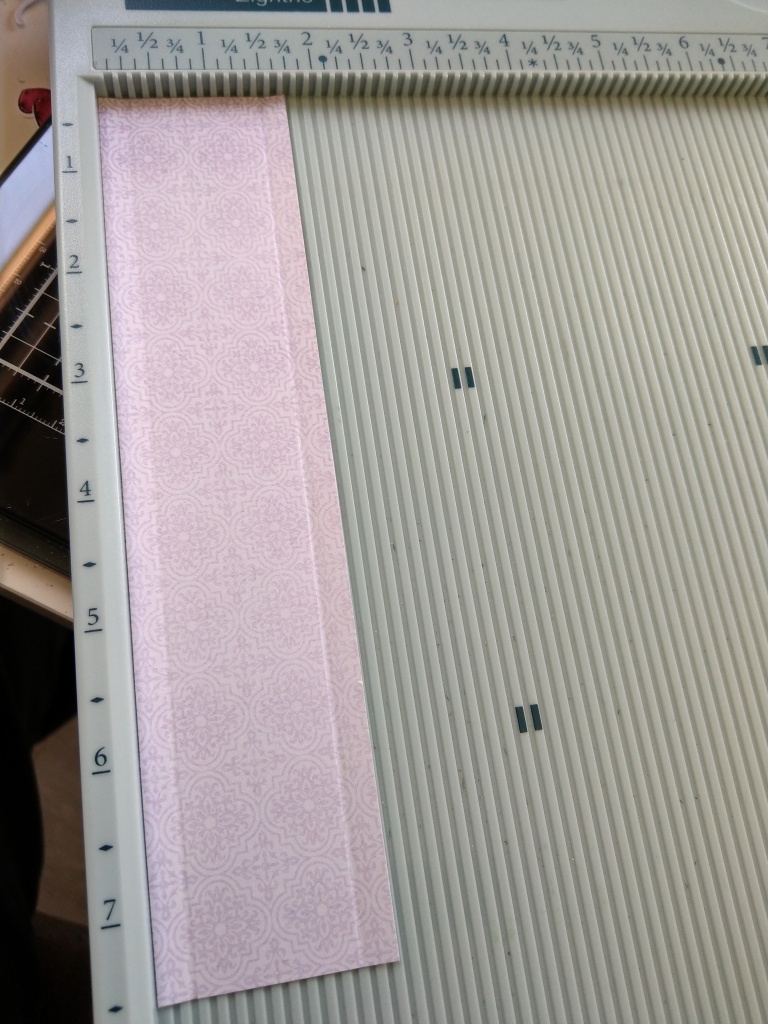
Cut pattern paper at 2 3/4 x 7″ and score 1/4″ both side. Using a smooth cylindrical shape curve the spine cover and adhere with only the 1/4″ tabs.
Die-cut tags from the paper pad and thread twine through the curved spine and attach the tags.

Die-cut Simply Classic Oval Frame with decorative papers and adhere velum behind adhere onto the book cover with dots.
Stamp onto white cardstock small Wild Poppy and colour. Adhere two petals together using hot glue. Pierce the centre with a pokey tool and thread stamen through, adhering at the back with hot glue. Trim off excess wire.
Decorate with front of the book cover with die-cuts and poppys.
Stamp onto white cardstock the sentiment and die-cut with banner die. Shape the die-cut then adhere.
TIP: to add more sparkle to your fairies wings apply dries clear with your fingertips and sprinkle glitter over.
I hope you have found my blog helpful and inspiring today and I look forward to seeing your makes on the Heartfelt Creations Official Facebook page.
Please join me again for more crafty fun on the Heartfelt Creations Alumni Blog Hop which takes place the last Friday of every month.
Keeeeep crafting! (homage to Strictly 😂)
Crafty hugs, Lynn 💕
Social Media as follows:
F: What The Heart Wants Facebook
T: What The Heart Wants Twitter
I: What The Heart Wants Instagram
Heartfelt Creations Products List:
- Large Mushroom Cottage Die
- Large Mushroom Cottage Cling Stamp Set
- Mini Mushroom Cottages Die
- Mini Mushroom Cottages Cling Stamp Set
- Mushroom Fairies Die
- Mushroom Fairies Cling Stamp Set
- Mushroom Cottage Accents Die
- Mushroom Cottage Accents Cling Stamp Set
- Mushroom Cottage Paper Collection
- Wild Poppy Accents Die
- Wild Poppy Accents Cling Stamp Set
- Wild Poppy Die
- Wild Poppy Cling Stamp Set
- Simply Classic Oval Frame Die
- Ornamental Tags Die
- Ticket and Tags Die
- Deluxe Flower Shaping Kit
- Assorted Bead Stamens-Medium
- Arrows and Banner Die
- Elegant Gateway Sentiments Cling Stamp Set
Heartfelt Creations June 2022 Alumni Blog Hop Links
Kathy Clement- Kathy by Design
Vicki Dutcher- All I Do Is Stamp
Amarilys Doria- Amarilys’ Creations
Bozena- BBartCards
Alissa Wells- Will Run for Stamps
Lisa Gregory- What a Beautiful Mess
Candy Slabaugh- Candy’s Creations
Gloria Stengel- Scraps of Life
Monica Edwards- Simply Monica
Heartfelt Creations- Heartfelt Creations Blog

Wow, Lynn! What an amazing project! I really love the lighted mushrooms! Such a generous tutorial, too! Thank you! And thanks for hopping with us this month, my friend! xo
LikeLiked by 1 person
Thank you so much Kathy 😊
LikeLike
this is amazing! I love it and I wish I could make this. I will try! thank you so much for sharing it.
LikeLiked by 1 person
That’s great give it a go 😊
LikeLike
Just love your 3D card Lynn. It is amazing. This is such a fun collection to work with.
LikeLiked by 1 person
I just had to get this one I love it too 😊
LikeLike
Oh wow Lynn! This is an AMAZING project! I am so happy to see you here on the Alumni design team because I just love your creativeness! What a great booklet you’ve made! Love it.
LikeLike
Thank you Terry 😊
LikeLike
Love this book, miss your creative talent on the design team but I’m glad your on the alumni blog❤
LikeLiked by 1 person
So sweet of you thank you 😊
LikeLike
Your book card is amazing Lynn. Thank you for detailed instructions.
LikeLiked by 1 person
Thank you so much 😊
LikeLike
I was thinking as I was reading your notes and looking at your pictures, what a wonder project – so well thought out and execution marvelous. And then you blew my socks off with adding the lights! Coupled with such a wonderful narrative on how to create this project extraordinaire left me wondering how you are going to top this in August!
LikeLiked by 1 person
Thank you so much 😊
LikeLike
The depth of this project is wonderful! And the lights are such a surprise! Thanks for the tutorial on how to create the “book” framework. This is so much more than a card…this is a decorative gift!!
LikeLiked by 1 person
Thank you so much have fun creating 😊
LikeLike
Thanks for the tutorial on this amazing project, Lynn! Love the added light element.
LikeLiked by 1 person
Thank you Anne 😊
LikeLike
Wow! This is amazing! And thank you for the great instructions.
LikeLiked by 1 person
Thank you 😊
LikeLike
I love that sweet surprise inside! What a wonderful project and great directions! Simply magical!!
LikeLiked by 1 person
Thank you 😊
LikeLike
This is so creative and I love the closeup pictures so the tutorial is easier to follow. The light element is a sweet surprise and a great touch.
Sandra Smith
LikeLiked by 1 person
Thank you 😊
LikeLike
A beautiful book! I love this collection and it is perfect in your project. Your directions are very clear and detailed! This is a must try for me! Thanks!
LikeLiked by 1 person
Thank you have lots of crafty fun 😍
LikeLike
Fantastic 3D card and great tutorial on how you made it.
LikeLiked by 1 person
The little mushroom village is so cute. I really like the way you shaped the flowers, too.
LikeLiked by 1 person
Such a sweet collection, thank you 😊
LikeLike